If you’ve ever walked past a busy automotive paint shop and watched a late-model truck or sedan roll out of a bay, the first thing you might notice is the glossy, uniform finish on the doors, fenders, and hood. Most people, though, rarely think about the engine bay—yet it’s one of the most critical (and often overlooked) parts of the painting process. As a supplier who’s worked directly with automotive paint shops for over a decade, I’ve stood next to techs in dozens of bays, walked through test trials for new prep systems, and answered countless questions from shop owners who want better, longer-lasting results under the hood. Today, I’m breaking down exactly how those engine bays get painted, the mistakes that sink projects, and why partnering with a reliable supplier makes all the difference. Automotive Paint Shop
First, let’s start with the part no one talks about: engine bay painting isn’t the same as painting the exterior. The engine bay is a harsh environment. Parts here sit 10 to 15 inches from a 200-degree engine, exposed to road salt, oil leaks, coolant drips, and constant vibration from the transmission and drivetrain. A coat of regular exterior paint will chip, peel, or discolor in 12 to 18 months, whereas a properly applied engine bay finish can last 5 years or more. That’s why the process starts long before any paint is mixed: it’s all about prep.
I’ve seen shops cut corners here, and 9 times out of 10, that’s where trouble begins. The first step is total disassembly—no shortcuts. Techs don’t just wipe around the engine block; they remove every part that can be taken off: the intake manifold, alternator, starter, valve covers, even the plastic trim around the firewall. It might seem tedious, but leaving hoses, wires, or sensors in place means trapped oil or grime will leach through the paint over time, causing blisters or discoloration. A good shop will also label every small part with a numbered bag or photo, so nothing gets lost when reassembly time comes.
Next comes degreasing, and this is where supplier expertise matters most. You can’t use a standard kitchen degreaser here—engine bay grime is baked on: oil, carbon residue, brake dust, and road grime that’s fused to metal and plastic. For years, shops used harsh, solvent-based degreasers that were bad for techs’ lungs and left a sticky residue behind that ruined paint adhesion. Today, most reliable shops use a combination of alkaline-based degreasers (great for heavy oil and grease) and bioremediation solutions that break down carbon without harsh fumes. As a supplier, we work with shops to test degreaser strength for different materials: aluminum engine blocks can handle a stronger solution than plastic intake manifolds, which can warp if exposed to too much chemical. After degreasing, every part gets a power wash with hot water at 180 degrees, followed by a rinse with deionized water to prevent mineral spots that show up after paint cures.
Once dry, the bay moves to sanding and surface prep. Again, engine bay metal is different from exterior sheet metal. Exterior panels are smooth, but engine blocks have cast iron or aluminum surfaces with small pores and texture that regular sandpaper can’t smooth. Techs use 80-grit aluminum oxide sandpaper for heavy cast iron parts and 120-grit for aluminum, being careful not to sand too hard—over-sanding removes the micro-texture that primer needs to stick. For plastic parts, they use a 180-grit sandpaper and a plastic-specific adhesion promoter, since plastic is non-porous and paint will slide right off without it. I’ve seen shops skip the sanding step entirely, or use a random orbital sander that’s too aggressive, and those projects almost always come back with peeling paint within a year.
After sanding comes masking. This is another area where shop experience shows. Masking the engine bay means covering every opening that shouldn’t get paint: intake ports, spark plug holes, coolant passages, electrical connectors, and even the rubber gaskets around the firewall. Techs use high-temperature masking tape (not regular painter’s tape, which melts under engine heat) and aluminum foil to cover delicate parts like alternators, sensors, and fuel injectors. As a supplier, we provide shops with custom-cut masking kits for common engine models—cutting pre-sized tape and foil saves techs 2 to 3 hours per project, which cuts down on labor costs and reduces the chance of mistakes.
Now, the paint itself. Most people assume engine bay paint is the same as car exterior paint, but that’s not true. Engine bay paint needs to withstand high heat, oil, and vibration, so it’s formulated with different ingredients than exterior paint. There are three main types of paint used for engine bays, each for a different need:
-
Epoxy Primer: This is the base coat for almost all engine bay projects. Epoxy is tough, adheres to both metal and plastic, and resists chemicals like oil and coolant better than any other primer. It’s applied in two thin coats, not one thick coat—thick coats take too long to cure and can blister when exposed to heat. A good epoxy primer will cure in 24 hours at room temperature, or 1 hour at 140 degrees in a bake oven, which is standard in professional paint shops.
-
High-Temperature Enamel: This is the top coat most shops use for engine blocks, exhaust manifolds, and other metal parts. Enamel is durable, comes in a wide range of colors (from classic black to custom racing red), and can withstand up to 500 degrees of heat without discoloring. For parts closer to the exhaust, like the intake manifold, shops use a ceramic-enamel blend that can handle up to 1,000 degrees—regular enamel would burn off at that temperature.
-
Water-Based Acrylic Paint: More shops are switching to water-based paint for engine bays now, thanks to lower VOC (volatile organic compound) levels that are better for techs and the environment. Modern water-based acrylics are just as durable as solvent-based enamels, and they cure faster, which speeds up turnaround time for customers. As a supplier, we’ve seen a 30% drop in solvent-based engine bay paint sales in the last five years, as shops prioritize compliance with environmental regulations and tech safety.
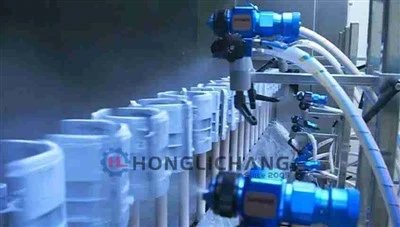
When applying paint, it’s all about thin, even coats. Techs use a HVLP (high-volume, low-pressure) spray gun, which delivers a fine mist of paint that adheres evenly without runs or drips. They spray in a well-ventilated booth, often with a heat lamp to keep the bay at 70 to 80 degrees, which helps the paint cure quickly. For small, detailed parts like valve covers, some shops use a paint gun with a 1.0 mm tip, while larger engine blocks use a 1.5 mm tip to cover more surface area. I’ve seen novice painters spray one thick coat and end up with sagging that takes hours to sand out, or too light a coat that shows the original metal underneath.
Once the paint is applied, the cure process is critical. Exterior paint cures at room temperature for 24 hours, but engine bay paint needs a bit more. Most shops use a bake oven set to 120 to 150 degrees for 2 to 3 hours, which makes the paint harden fully so it doesn’t soften or peel under engine heat. For shops without a bake oven, they use infrared heat lamps for 8 to 10 hours, though this is less reliable and can lead to uneven curing if not monitored closely.
After curing, the final step is reassembly. Techs go back to those numbered bags and carefully install every part, using new gaskets and seals where needed to prevent leaks. They also apply a clear coat to painted plastic parts (not metal parts, which don’t need it) to protect against UV damage, which causes plastic to fade over time. A good shop will also do a final wipe down of all painted surfaces with a lint-free cloth and a small amount of wax, to remove any residue from the cure process and add a small layer of protection.
Now, as a supplier, I know there are a few common myths about engine bay painting that I hear all the time. The first is that you can paint an engine bay without removing parts. I’ve tested this myself: last year, we worked with a shop that tried to paint a Chevy Silverado engine bay without taking off the intake manifold, and within 6 months, paint was peeling around the intake gaskets. Trapped oil had seeped under the paint, and there was no way to clean it properly. The second myth is that any paint will work. I’ve seen a shop use a $10 can of spray paint from a local auto parts store for a engine block, and it flaked off after 3 months. Store-bought spray paint isn’t formulated for high heat or chemicals, so it’s a false economy.
The third myth is that engine bay painting is too expensive. When you calculate labor, materials, and the lifespan of a properly painted engine bay, it’s actually a good investment. A full engine bay paint job costs $800 to $1,500, depending on the size of the vehicle, and it can save you thousands in engine repairs—corrosion from moisture trapped under bad paint can eat through metal over time, leading to expensive block repairs. It also makes reselling a car or truck much easier; a clean, properly painted engine bay is one of the first things buyers check, and it adds $1,500 to $3,000 to the resale value of a used vehicle, based on recent data from auto dealers.
So why does working with a reliable supplier matter for this process? It’s not just about selling paint—it’s about partnering to solve problems. When a shop is struggling with paint adhesion on aluminum engine blocks, we can send test samples of our primer and adjust the formulation to work better. When a shop needs to cut down on labor time, we can provide custom masking kits that fit the most common engine models, so techs don’t have to cut tape by hand. We also train shop teams on the latest prep techniques, like how to use new bioremediation degreasers that cut cleaning time in half.
I’ll be honest: not all suppliers are the same. A lot of big paint companies just sell bulk gallons of paint and don’t offer any support, leaving shops to figure out issues on their own. Our goal as a supplier is to be part of the shop’s team—when a tech calls at 2 a.m. with a question about curing temperatures for a custom race car engine, we answer. When a shop needs to scale up for a big order of engine bay paint for 50 vehicles, we make sure it’s available on time.
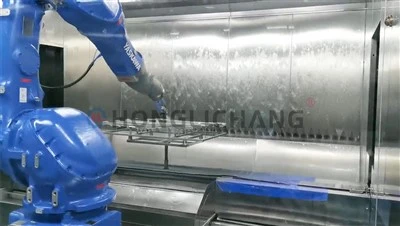
If you own an automotive paint shop, or are a fleet manager looking to maintain your vehicles, you know that the engine bay is a make-or-break part of a finish job. Skipping prep, using the wrong paint, or cutting corners on masking will only lead to unhappy customers and repeat work. Our team has spent years refining the engine bay painting process, from the initial degreasing to the final clear coat, and we work directly with shops to make every step as efficient and high-quality as possible.
Turnkey Paint Line If you’re interested in learning how we can help your shop improve engine bay paint results, reduce labor time, or source high-quality, durable paint products, we’d be happy to chat. We offer free on-site trials for new prep systems, custom masking solutions, and technical support whenever you need it.
References
- Society of Automotive Engineers (SAE) International. "Performance Requirements for Automotive Engine Bay Coatings," SAE International Journal of Materials and Manufacturing, 2021
- Automotive Aftermarket Suppliers Association (AASA). "2022 Trends in Engine Bay Refinishing for Light Vehicles," AASA Industry Report
- DuPont Automotive Finishes. "Adhesion and Durability of Epoxy Primers for High-Temperature Automotive Applications," 2020 Technical Bulletin
- Environmental Protection Agency (EPA). "Volatile Organic Compound (VOC) Limits for Automotive Refinishing Coatings," 2021 Regulatory Update
Shenzhen Honglichang Machinery Manufacturing Co., Ltd.
We are one of the most professional automotive paint shop manufacturers and suppliers in China, also support customized service. Please feel free to buy advanced automotive paint shop for sale here from our factory. Welcome to contact us for quotation.
Address: No. A802, Building 2, Tianan Digital Plaza, Longgang, Shenzhen, China
E-mail: victor@honglichang.com
WebSite: https://www.honglichang-paint.com/
